How To Run a Macro in Excel: Beginner’s Guide
Learn how to run Excel macros: A comprehensive guide for beginners covering VBA basics, macro recording, and various execution methods.

.png)
.avif)
Efficiency is key when running a successful business. Every small business owner understands the true meaning behind the popular phrase, “Time is money.”
Fortunately, Microsoft Excel offers numerous ways to become more efficient without cutting corners or sacrificing accuracy. One valuable tool is the use of Excel macros.
In this article, we’ll look at what Excel macros are and how they can be beneficial to your business in helping to streamline tasks. We’ll provide a step-by-step tutorial on how to create and run a macro in Excel and look at the different methods used to run macros.
Note that your screens may look somewhat different depending on the version of Excel you’re using.
What are Excel macros?
An Excel macro is an action or set of actions that you can record and run unlimited times to automate repetitive tasks. The macro records your keystrokes and clicks and allows you to rerun them with the push of a single button. The cool thing is that you need to create an Excel macro only once—and then you can rerun it again any time you want. You can also edit a macro after you’ve created it.
Excel macros can help streamline your business processes and save time by facilitating repetitive and tedious tasks, especially when working with large datasets.
For example, let’s say you do the accounting for a marketing agency and need to visually indicate which clients are behind on payments at the end of every week. To do this, you highlight all clients who have paid in green and those who are behind on payments in red and apply bold formatting.
This fairly simple task can quickly become tedious and take a lot of time away from other important and more productive tasks. By creating and running a macro, you can quickly and accurately apply these formatting changes to your selected cells in your Excel file.
First: Enable the Developer tab
To run a macro, you first need to enable the Developer tab to ensure it’s visible on the Excel ribbon. Since it’s not visible by default you’ll need to add it manually.
If you have a Windows computer, follow these steps:
- Go to File.
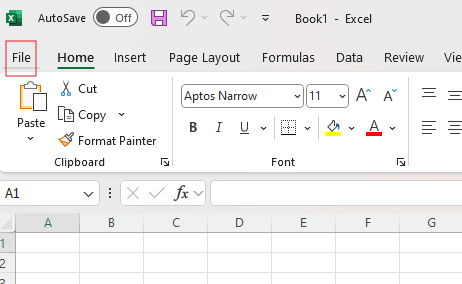
- Click Options (you can find it at the bottom of the column).

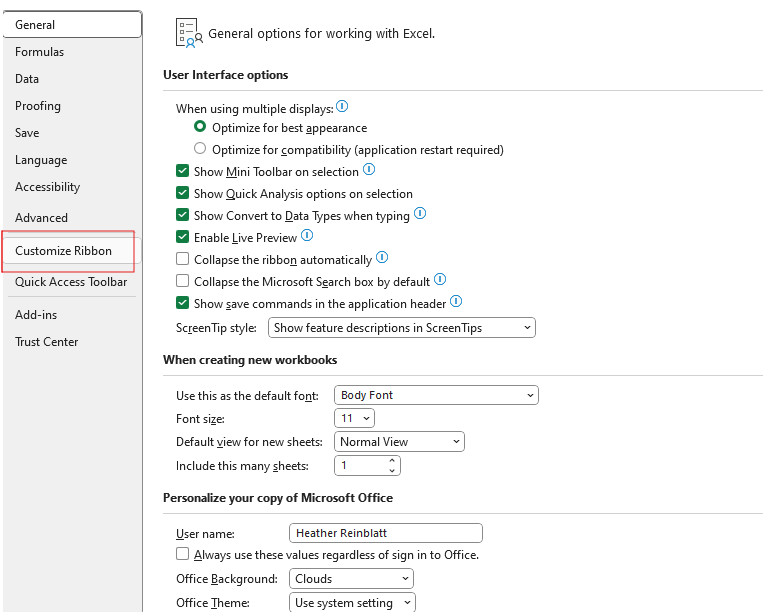
- Select Customize Ribbon.
If you have a Mac, you’ll want to follow these steps:
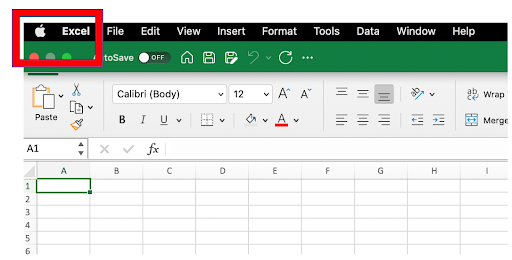
- Go to Excel.
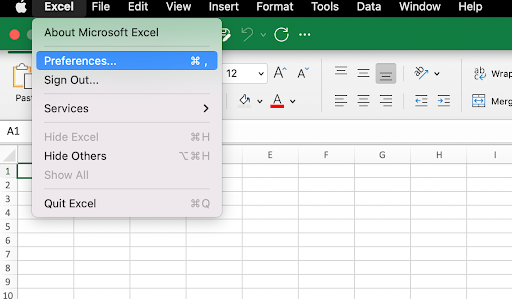
- Click Preferences.
- Select Ribbon & Toolbar.

For Windows and Mac: You should now be in the Customize the Ribbon section. Under Main Tabs, select the checkbox next to Developer and click Save or OK. You’ll now see the Developer tab in the ribbon.


How to record a macro in Excel
To automate an Excel macro, you’ll first need to record it. Once it’s recorded, you can run it as many times as you want. Here’s a step-by-step guide on the macro recording process:
- Click the Record Macro button or the red bull’s-eye from the Developer tab in the Code group on the left side of the Developer toolbar. (For Windows, you can alternatively press Alt + T + M + R.)

- Name the macro under the Macro name box and try to be as descriptive as possible. As you become comfortable with macros, you may want to use multiple macros for different purposes, so a descriptive name can help you stay organized. (Note: The macro name needs to start with a letter, but subsequent letters can be numbers, letters, or underscore characters. You won’t be able to use spaces, however.)
- Click on the drop-down arrow at the right of the Store macro in box and select where you would like to store it. You can choose This Workbook, Personal Macro Workbook, or a New Workbook.
- Type an upper-case or lower-case letter in the Shortcut key box to create a shortcut for the macro. It’s important to note that a macro shortcut key may override any other existing equivalent shortcut keys as long as the Excel workbook that contains the macro shortcut is open. It can happen that Excel prevents you from using an existing shortcut key. In this case, it’s best to come up with a unique key. Here is a list of Ctrl keyboard shortcuts assigned in Excel.
- Type a description of what the macro does in the Description box. This step is optional but can help keep your macros organized and avoid confusion, especially if you create multiple macros. This is what steps 2 through 5 should look like:

- Click OK to begin recording.
- Complete the steps you’d like to record to perform on future tasks.
- Whenever you’ve completed the action, be sure to click Stop Recording or the square black stop recording button in the Developer tab. (For Windows, you can alternatively press Alt + T + M + R.)

You have now successfully recorded a macro.
Other methods for running Excel macros
Excel offers multiple methods to run macros. We look at six and provide step-by-step instructions for using each method.
1. Run a macro from the Developer tab
Follow these steps to run a macro from the Developer tab:
- Make sure you open the workbook that contains the macro you want to run.
- Head to the Developer tab and click on Macros.

- Click on the Macro name you want to run and press the Run button.

2. Run a macro using a keyboard shortcut
If you followed all the steps above explaining how to record a macro in Excel, you’ve already assigned a shortcut key to your macro. However if you have an existing macro without an assigned shortcut key, follow these steps to make the assignment:
- Click on Macros in the Code group under the Developer tab.

- Under the Macro name box, select the macro you want to assign the shortcut key to.

- Click on the Options button to open the Macro dialog box.

- Type the letter you want for your keyboard shortcut in the Shortcut key box. You may also enter an optional description of the macro in the Description box

- Click OK to save your changes or Cancel to close the dialog box.
- Run the macro by using your new shortcut key.some text
a. If you’re using Windows, press Ctrl + letter for lowercase letters and Ctrl + Shift + Letter for uppercase letters.
b. If you’re using Mac, press Option + Command + letter for lowercase letters and Ctrl + Shift + Letter.
3. Run a macro from the Visual Basic Editor (VBE)
Here’s how to run a macro from the VBE:
- Head to the Developer tab.
- Click on Visual Basic to launch the Visual Basic for Applications (VBA) window. You can also open the VBE by pressing Alt + F11 (Windows) or Fn + Opt + F11 (Mac).

- Open the module containing the macro you want to run under Project Explorer. The pane on the right will list all of the macros available inside the selected module.

- Place your cursor anywhere within the VBA code between Sub and End Sub, and press F5, or go to the toolbar and click on Run>Run Macro to select the macro you want to run.

4. Add a macro button to the Quick Access Toolbar (QAT)
Here’s how to add a macro button to the QAT:
- If you’re working on a Windows computer, go to File > Options > Quick Access Toolbar.some text
a. Alternatively, if you’re working on a Mac, click on the ellipsis (three dots) in the Quick Access Toolbar and click on More Commands… in the drop-down menu.

- Select Macros in the Choose commands from list.
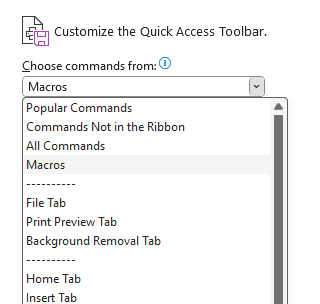
- Add the desired macro to the list of buttons on the Quick Access Toolbar by selecting the macro and then clicking on Add >>>.
- Click Save or OK.

- To run the macro, click on the icon to apply it to your cells. You have now successfully added the macro to the Quick Access Toolbar, where you can access it with a simple click.

5. Make a macro button from a graphic object
Creating a hot spot on a graphical object can allow you to run an assigned macro by clicking on the assigned graphical object. Here’s how to assign a macro to a graphic object:
- Insert a picture, draw a shape, or add any other graphical object to your worksheet.

- Right-click on the graphic object and click on Assign Macro…

- Click on the macro to assign it to the graphical object, then click OK. You have now assigned that macro to your graphical object.
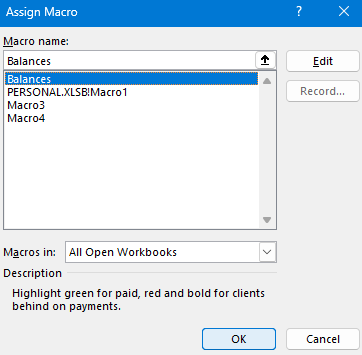
- Click on the object to run the macro on selected cells.
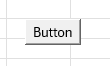
6. Create a macro button in Excel
Here’s how to create a macro button in Excel:
- Click on an area away from your filled cells to place a button.
- Click on the Developer tab and Insert.
- Click on Button.

- Select the macro you want to assign to the button, and click on OK.

- To run the macro, click on a cell and then on the button you have created. You have now successfully added a button to your Excel worksheet that will run the assigned macro with a simple click.
Make the most out of Microsoft Excel for your business
Excel can be very useful to small businesses, but mastering its many features and functions can be time-consuming and challenging. Excel has so many applications that may be confusing and overwhelming to someone not skilled in using all of its functions and capabilities. Engaging an expert for support can be very helpful.
Hiring a freelance Microsoft Excel expert on Upwork can help you get the most out of Excel for your business and increase productivity while freeing up your own time. Browse through our selection of qualified experts. With a simple click, you’ll get a detailed view of each professional’s skills and experiences.
If you’re ready to kick-start your search for a Microsoft Excel professional, sign up for an Upwork account today.

.avif)

Author Spotlight

Upwork is the world’s largest human and AI-powered work marketplace that connects businesses with independent talent from across the globe. We serve everyone from one-person startups to large organizations with a powerful, trust-driven platform that enables companies and talent to work together in new ways that unlock their potential.