How To Use Adobe Firefly To Generate AI Images
Learn how to use Adobe Firefly’s text-to-image features to generate images with AI. Make your first image, learn Firefly’s controls, and discover applied uses.

.png)
.avif)
This guide will help you get started with Adobe Firefly and learn its essential features. We’ll cover what you need to know about Adobe’s AI image generator, walk you through a simple process for making images, and provide tips for best results.
What to know about Firefly
Adobe Firefly is a generative AI tool for making images, visual assets, text effects, and performing other design tasks image recoloring. Firefly technology also powers GenAI features in Adobe Creative Cloud apps, including Photoshop, Illustrator, Express, and Stock.
What sets Firefly apart from other AI image generators is its ethically sourced models and user interface (UI). Additionally, Firefly’s integrations with other Adobe software allow for streamlined edits and workflows unavailable in alternatives like Midjourney, DALL-E, and Stable Diffusion.
What Firefly can do
The web version of Firefly has four live features:
- Text to image. Generate AI images from text prompts.
- Generative fill. Modify images with AI tools, like adding or removing elements.
- Text effects. Create unique typography using AI.
- Generative recolor. Change color palettes for existing images.
For this guide, we’ll focus on the Text to image feature. Feel free to play around with the other features, found on the Firefly homepage.
Pricing
Firefly’s pricing depends on generative credits, which are processing tokens for Adobe’s generative AI tools. Credit allowances vary depending on the plan:
- Adobe Account: Free | 25 credits | Watermarked images
- Firefly Premium: $4.99/month |100 credits | No watermarks
- Creative Cloud: Each plan comes with at least 25 generative credits, but the amount varies for each subscription. See more about credits for each plan in Adobe’s FAQ.
Be warned that Adobe may change credit policies, such as those planned for November 10, 2023.
Firefly’s AI ethics
Firefly’s models are trained on Adobe Stock, licensed content, and images that are in the public domain. Essentially, the human-made images it uses for its training data are considered fair use. This is significant for those curious about AI but concerned about generators like Stable Diffusion using scraped and unauthorized content. Through Firefly, Adobe Stock contributors even get paid for training Adobe’s models.
Firefly also adds Content Credentials to any image created to support digital authenticity. For more information on this topic, see Adobe’s AI ethics page and its AI ethics principles.
Generate your first images in Firefly
Before getting into details about each tool’s functionality, let’s create some initial images to get the basics down.
1. Access Firefly
Go to Adobe Firefly. Sign in at the top-right or create an Adobe account.
If you’re an Upwork user (sign up), you can even get a discount on Adobe plans through partner offers. New Adobe users can instantly claim the discount. Existing Adobe customers will need to cancel their subscription and resubscribe to activate any offers.

You must Agree to Adobe’s Generative AI User Guidelines to continue. Give them a read; they’re short.
2. Create images
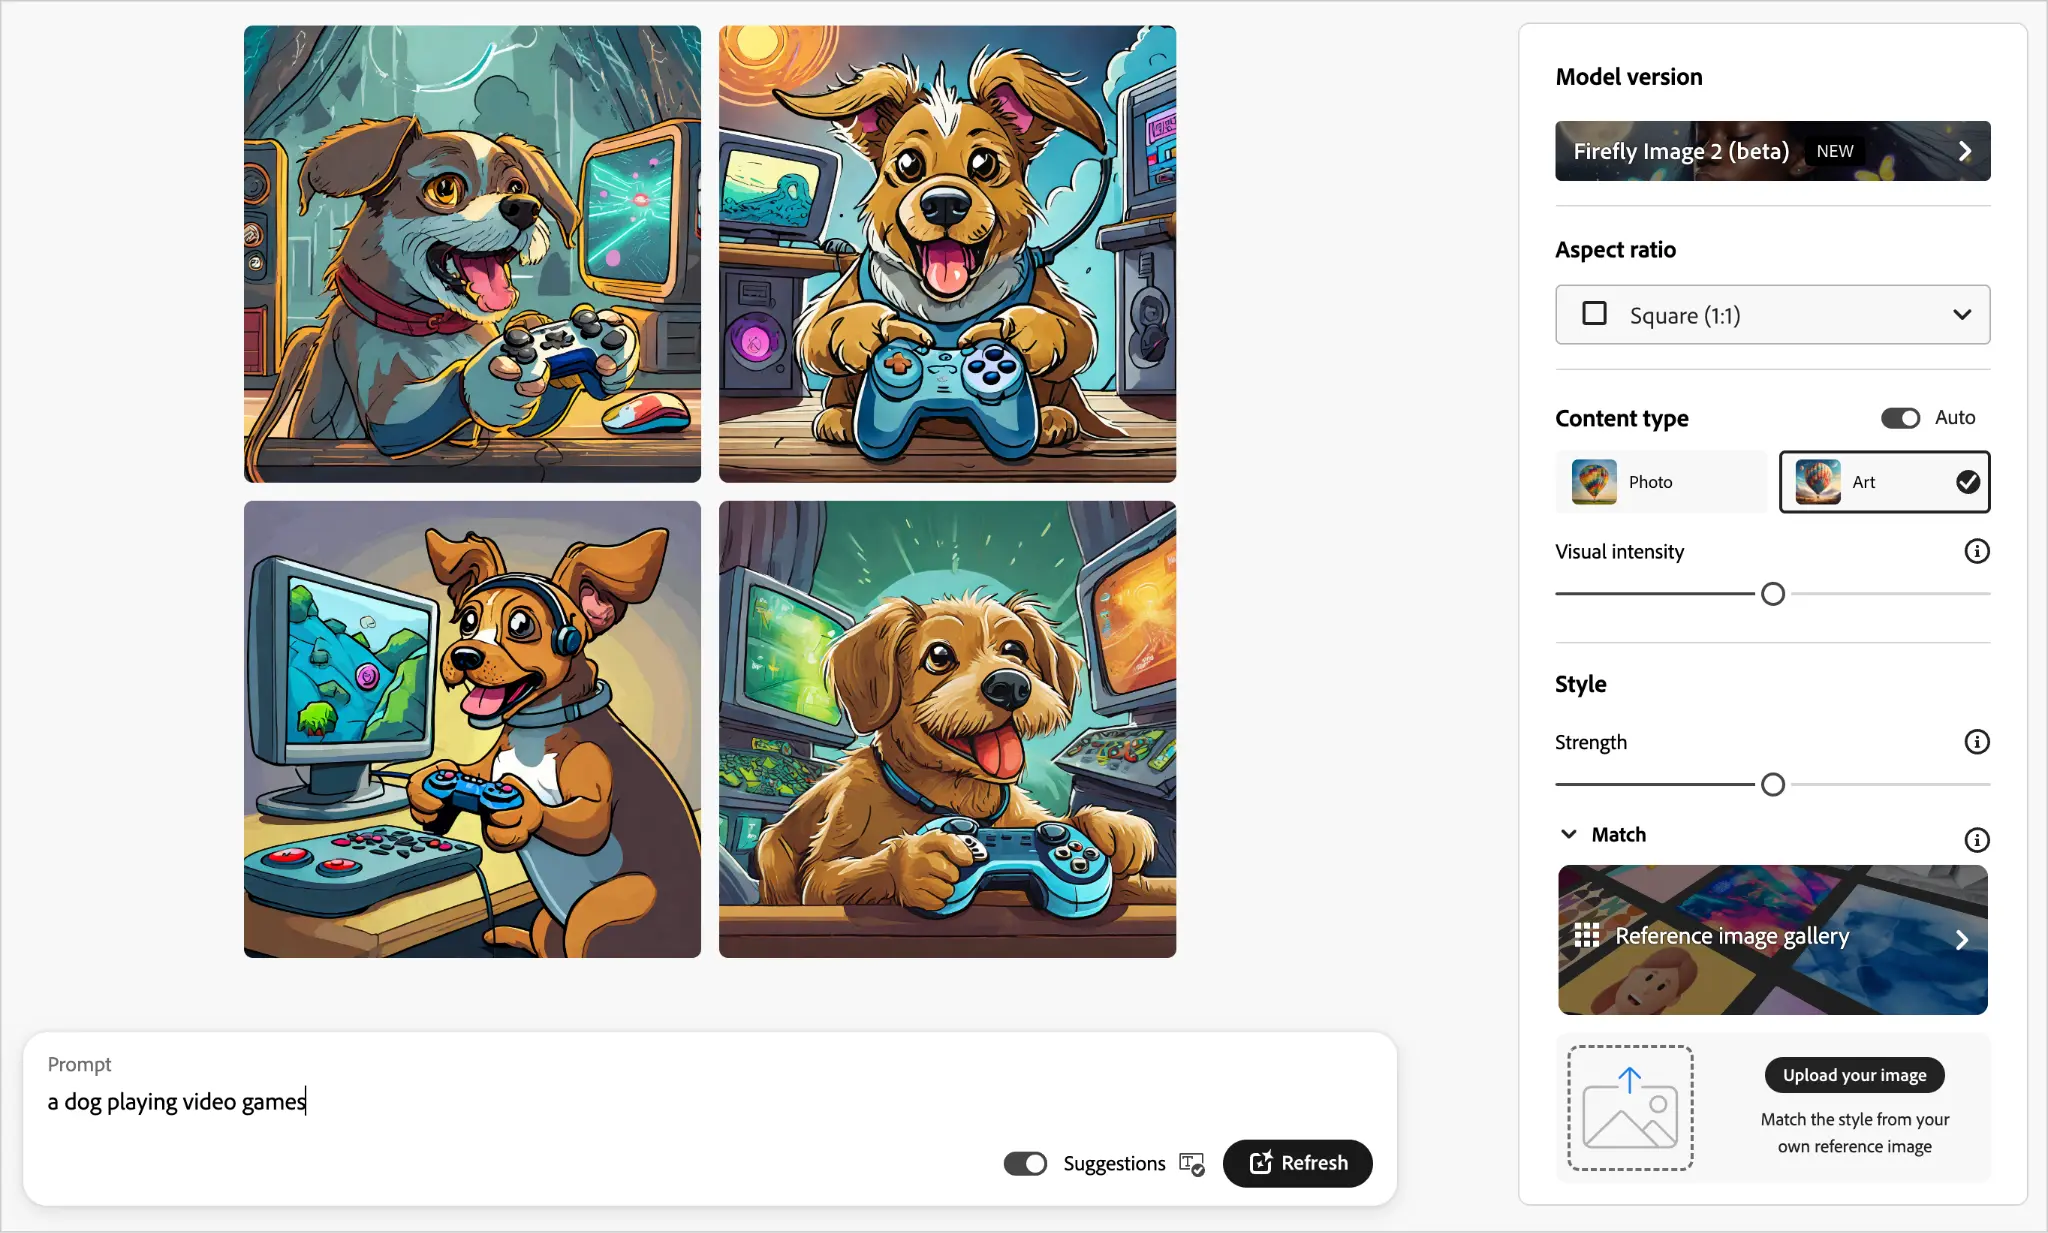
Click on the text field, write your prompt, and click Generate. We’ll use “a dog playing video games” in this example.

Examine the results. This is your starting point for creating great images.
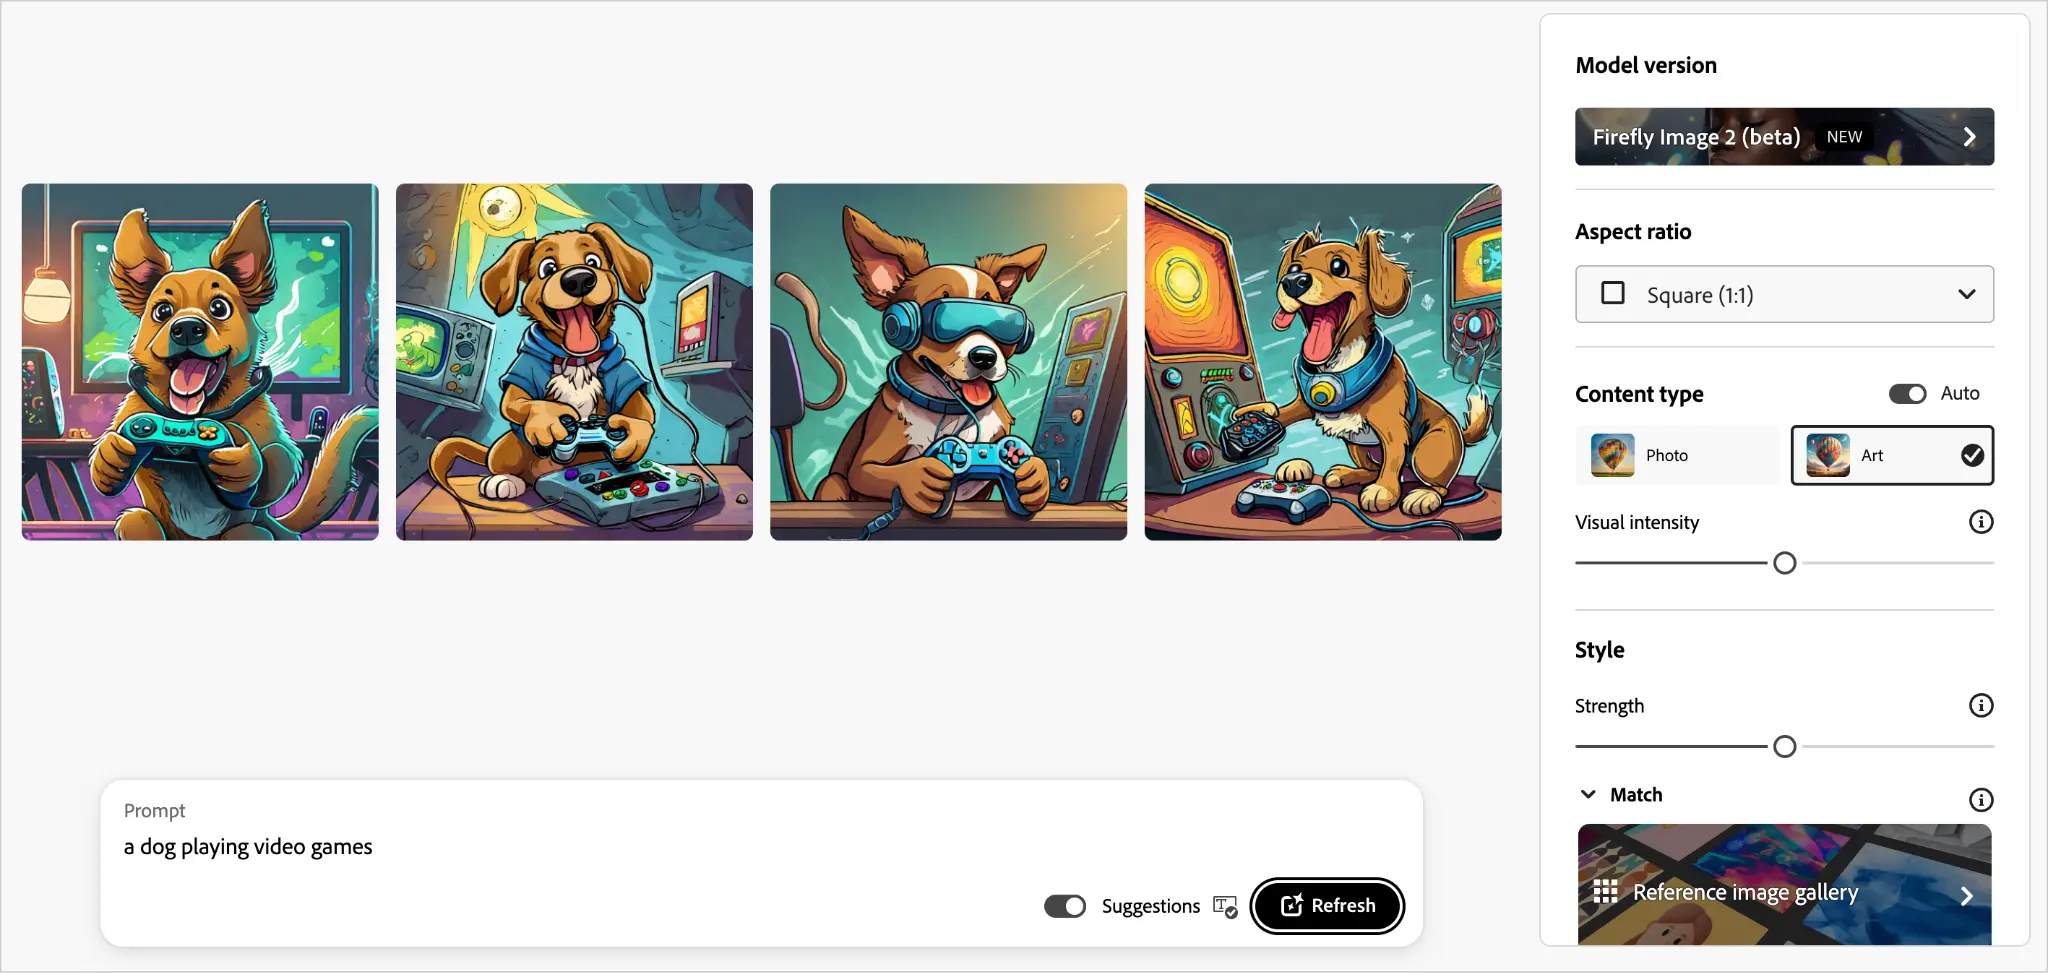
As you can see, AI art isn’t usually a one-and-done creative process. Chances are you’ll need to perform some prompt engineering, make adjustments, or hire an experienced designer to get usable results.
Next, we’ll cover Firefly’s controls, from the basics in the panel on the right of the user interface to the more advanced options that appear when you hover over images.
Firefly’s basic controls
Each option in the panel on the right in Firefly’s user interface affects your results differently. Once you learn them, you should have a solid understanding of Firefly and how to approach a creative workflow.
Right panel options
Model version
This lets you choose which model will drive image creation, Firefly Image 1 or 2.

It uses Firefly Image 2 by default, and you’ll want to keep it selected, as it’s an advanced version with sleeker controls that often yields better results.
If you still want to test out Firefly Image 1:
- Click on the Firefly Image 2 button.
- Choose Firefly Image 1 and click Confirm.
This will also slightly change the UI and show different controls. We’ll use Firefly Image 2 for this guide.
Aspect ratio
Use this setting to adjust your image dimensions. Currently, you can select Landscape, Portrait, Square, or Widescreen.
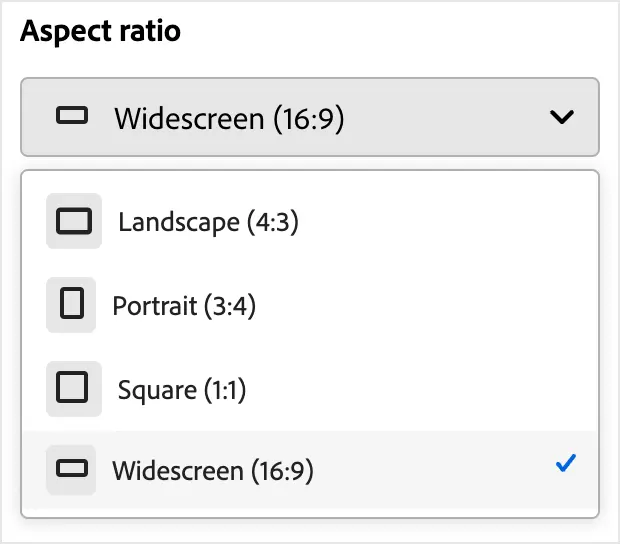
If you want to use another ratio, you’ll need to use Adobe Express or other Creative Cloud apps with Firefly features.
Content type
This option determines the style of the AI-generated images you'll get, either photo-realistic or art.
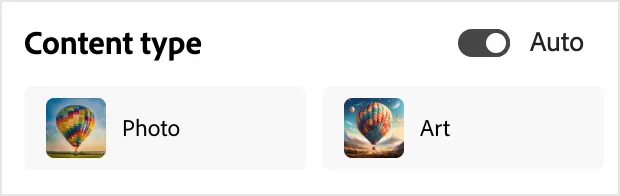
You can keep it on Auto for most purposes, but change it depending on what you want. If you know what kind of images you have in mind from the start, select the type and work from there.
Note: If you choose Photo, Firefly will reveal Photo settings below, which you can adjust further.
Visual intensity
Visual intensity is “the overall intensity of your photo’s existing characteristics.” Think of it as “image complexity” or “artistic skill” in UI-speak.

This setting drastically changes your images. Adjusting it will change your results' complexity and how artificial they look, especially for photos.
Style
This is a key section when working on your image. It houses the Strength slider, Match image style, and Effects settings.
Strength
The Strength slider adjusts “the strength of style matching and effects,” or how much the Style settings affect your images.

Because of that, try using it after you’ve applied edits in the Style section to see how it changes results. The effect will be much more apparent after applying other styles.
Match
The Match feature will reference and mimic another image, including the color and style.
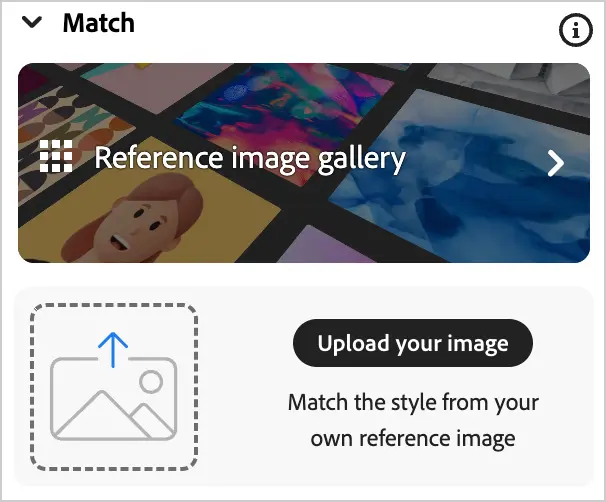
To use Match:
- Click the “Upload your image” button to use your own. (Make sure you have the rights to it.) You can also test out the feature using the Reference image gallery.
- Once you’ve chosen an image to match, click Generate.
Firefly will analyze the reference image and create similar results. This is a great feature when using specific colors or other branding guidelines.
Effects
The Effects controls change the overall style of your image. Firefly has useful thumbnails for each type to help with the process, including different art movements, themes, and materials. You can even add multiple effects to create unique visuals.

Try to familiarize yourself with the options by choosing All and browsing what’s available. This should boost your artistic prowess and creative control.
Firefly includes additional effects for smaller adjustments:

Each of these changes your results differently:
- Color and tone: Make your images cooler, warmer, pastel, etc.
- Lighting: Adjust lighting effects. Especially useful for photos.
- Composition: Change the camera position and other settings.
There are many effects to explore, so check out the options when you can and see how they work.
Photo settings
If Photo is selected as the Content type, Firefly will show more controls below the Effects panel. These allow you to adjust the Aperture, Shutter speed, and Field of view.

Photography experts will likely get the most out of these settings, but play around with them to see how they alter your AI photos.
Advanced settings
The Exclude from image field allows negative prompts, or those you don’t want included in results.
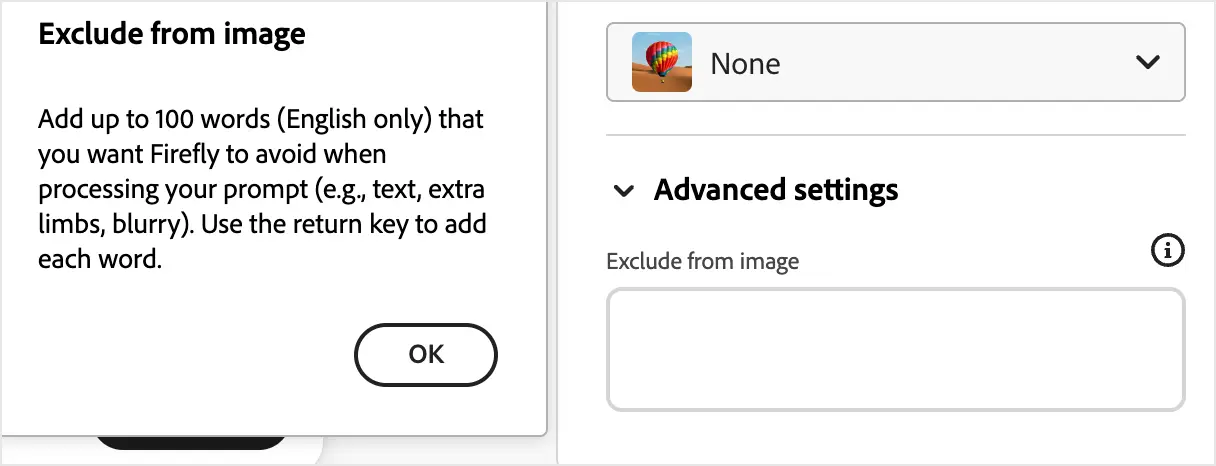
Negative prompts are helpful when you need to remove unwanted elements or add additional constraints to your text prompt.
Image hover controls
Firefly reveals many useful tools when you hover over an image:

These additional options include:
- Edit: Opens options for generative fill, showing similar results, using the image as a reference (Match), and additional choices for editing the image in Adobe Express. These are super useful, and we’ll examine them further below.
- More options (share icon): Perform additional tasks like downloading the image, copying it, or using it in other Adobe applications.
- Save to favorites: Click the heart to save the image to your Favorites. You can visit these from the “View Favorites” popup or Firefly’s main navigation.
- Rate this result: Give a thumbs up or down to help refine the AI model with your feedback.
- Report: Let Adobe know if something’s wrong by reporting results that seem harmful, offensive, biased, or have other concerning issues.
Though hidden, these options are vital for getting the most out of Firefly. Remember to use them when needed.
Tutorial: Make a YouTube thumbnail
Let’s apply what you’ve learned and walk through an example project. Say you’re an AI artist for hire and a client wants you to make a thumbnail for a YouTube video.
For creative purposes, imagine it’s a lo-fi synthwave music video meant for gaming sessions, featuring 8-bit dog bark beats. (Go with me.) We’ll use these as parameters for our process.
1. Enter a prompt
Start with the core idea, using “a dog playing video games” for the prompt.
If you used this prompt earlier, notice how similar and different the results are.
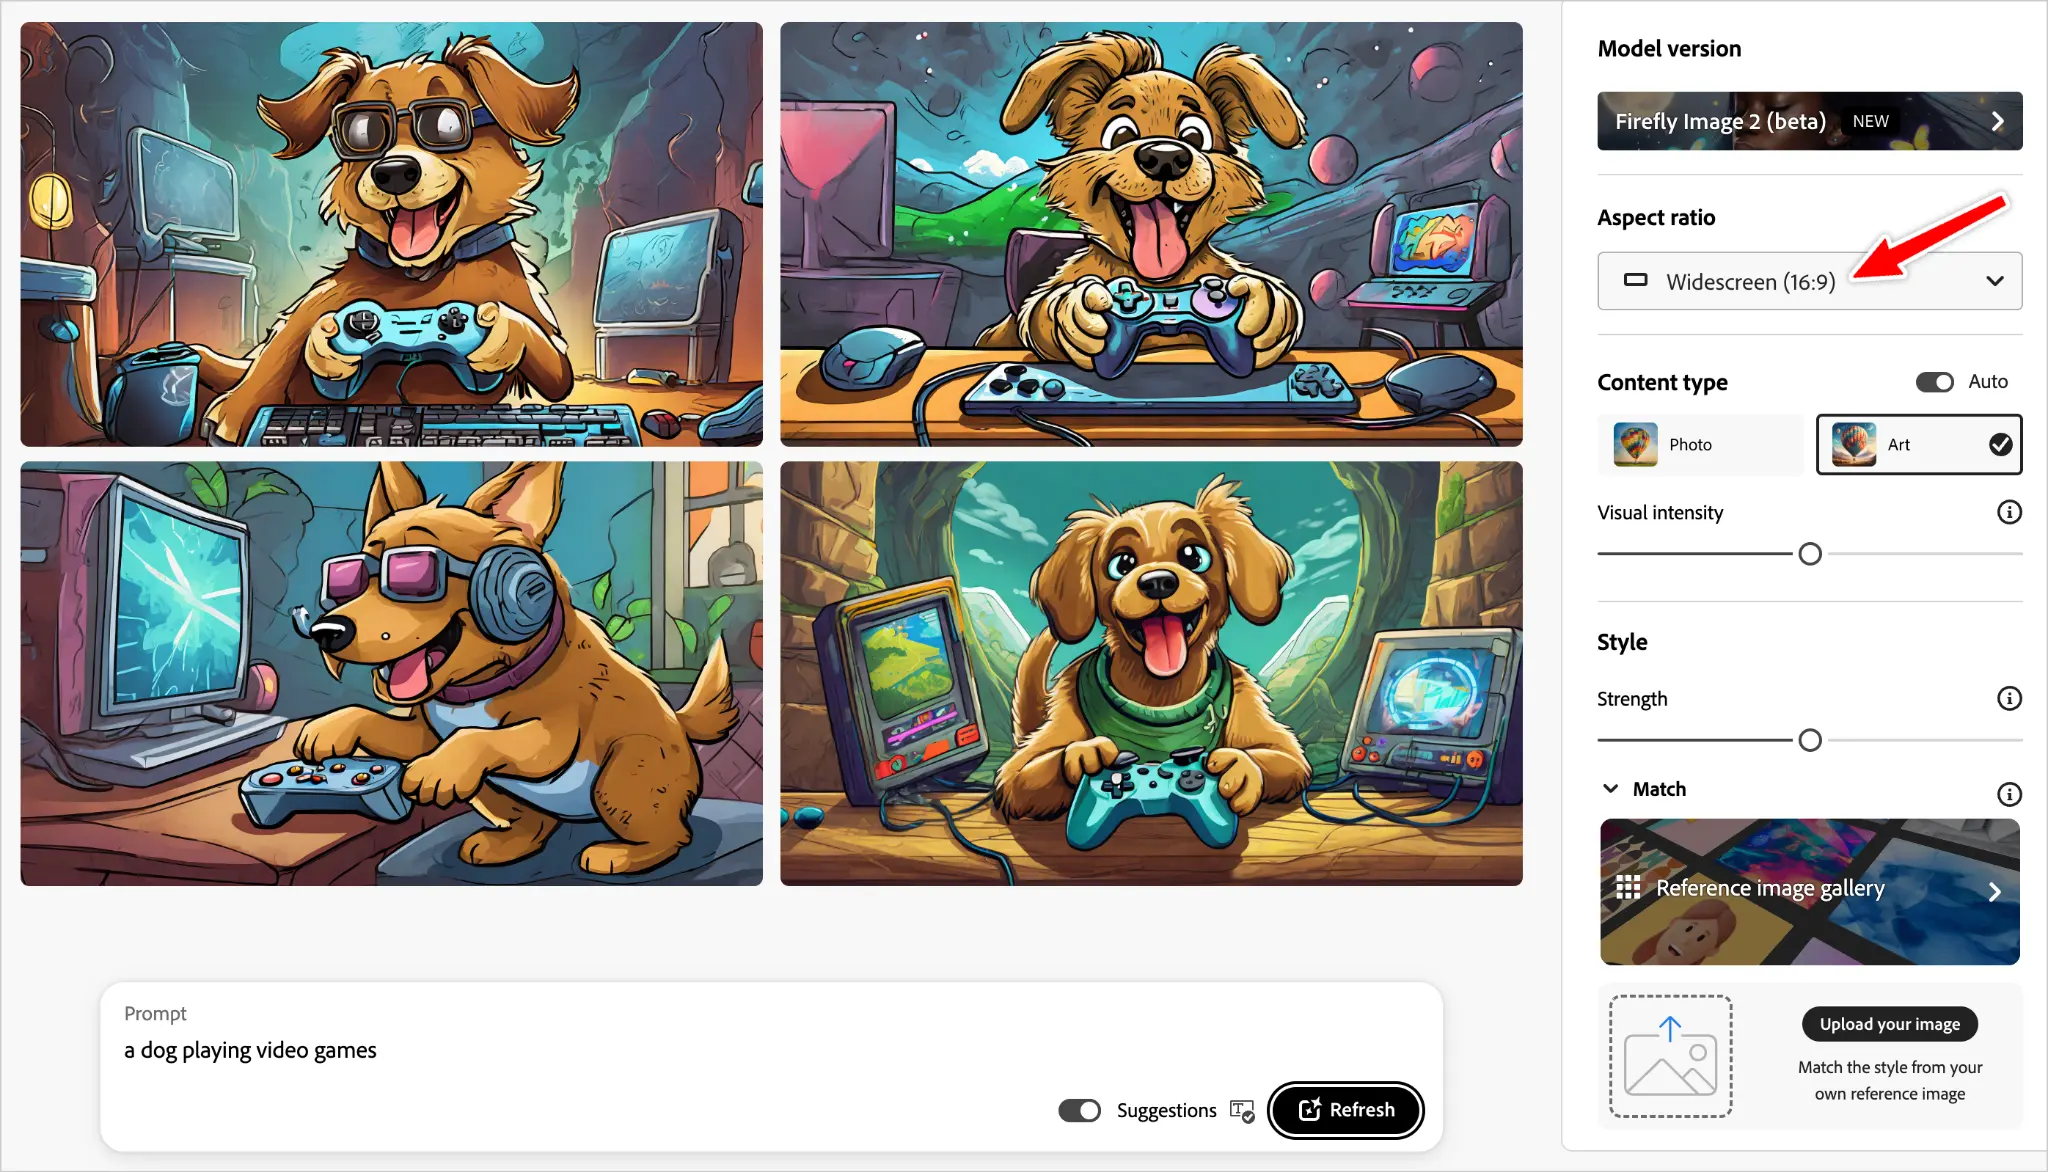
2. Set the aspect ratio
Since you’re making a thumbnail for YouTube, change the ratio to Widescreen.
3. Increase visual intensity
To get more impressive results, let’s turn up the intensity.

Number two is nice, so let’s work with that. If you don’t like the results, you can always hit the Refresh button in the Prompt toolbar to get more options.
4. Show similar results
Hover over the image with your mouse, click Edit at the top left, and choose Show similar.

This will swap the other three images for new ones that resemble the source:

If you don’t like the new results, you can always repeat the process to get other choices.
5. Use your favorite as a style reference
Number two is still the pick, so hover over the image again, choose Edit, and Use as style reference.

The image will appear to the left of your prompt to indicate its use.

This accomplishes the same as the Match feature. Be sure to Save your favorites and click Generate to get new results.

Since the mouse is now on the right side (not southpaw) for number two, we’ll repeat the Style reference process before the next step.
6. Add Effects
Since we’re creating this for a synthwave video, let’s echo that in the style. Go to the Effects section, choose Synthwave, and Generate new choices.
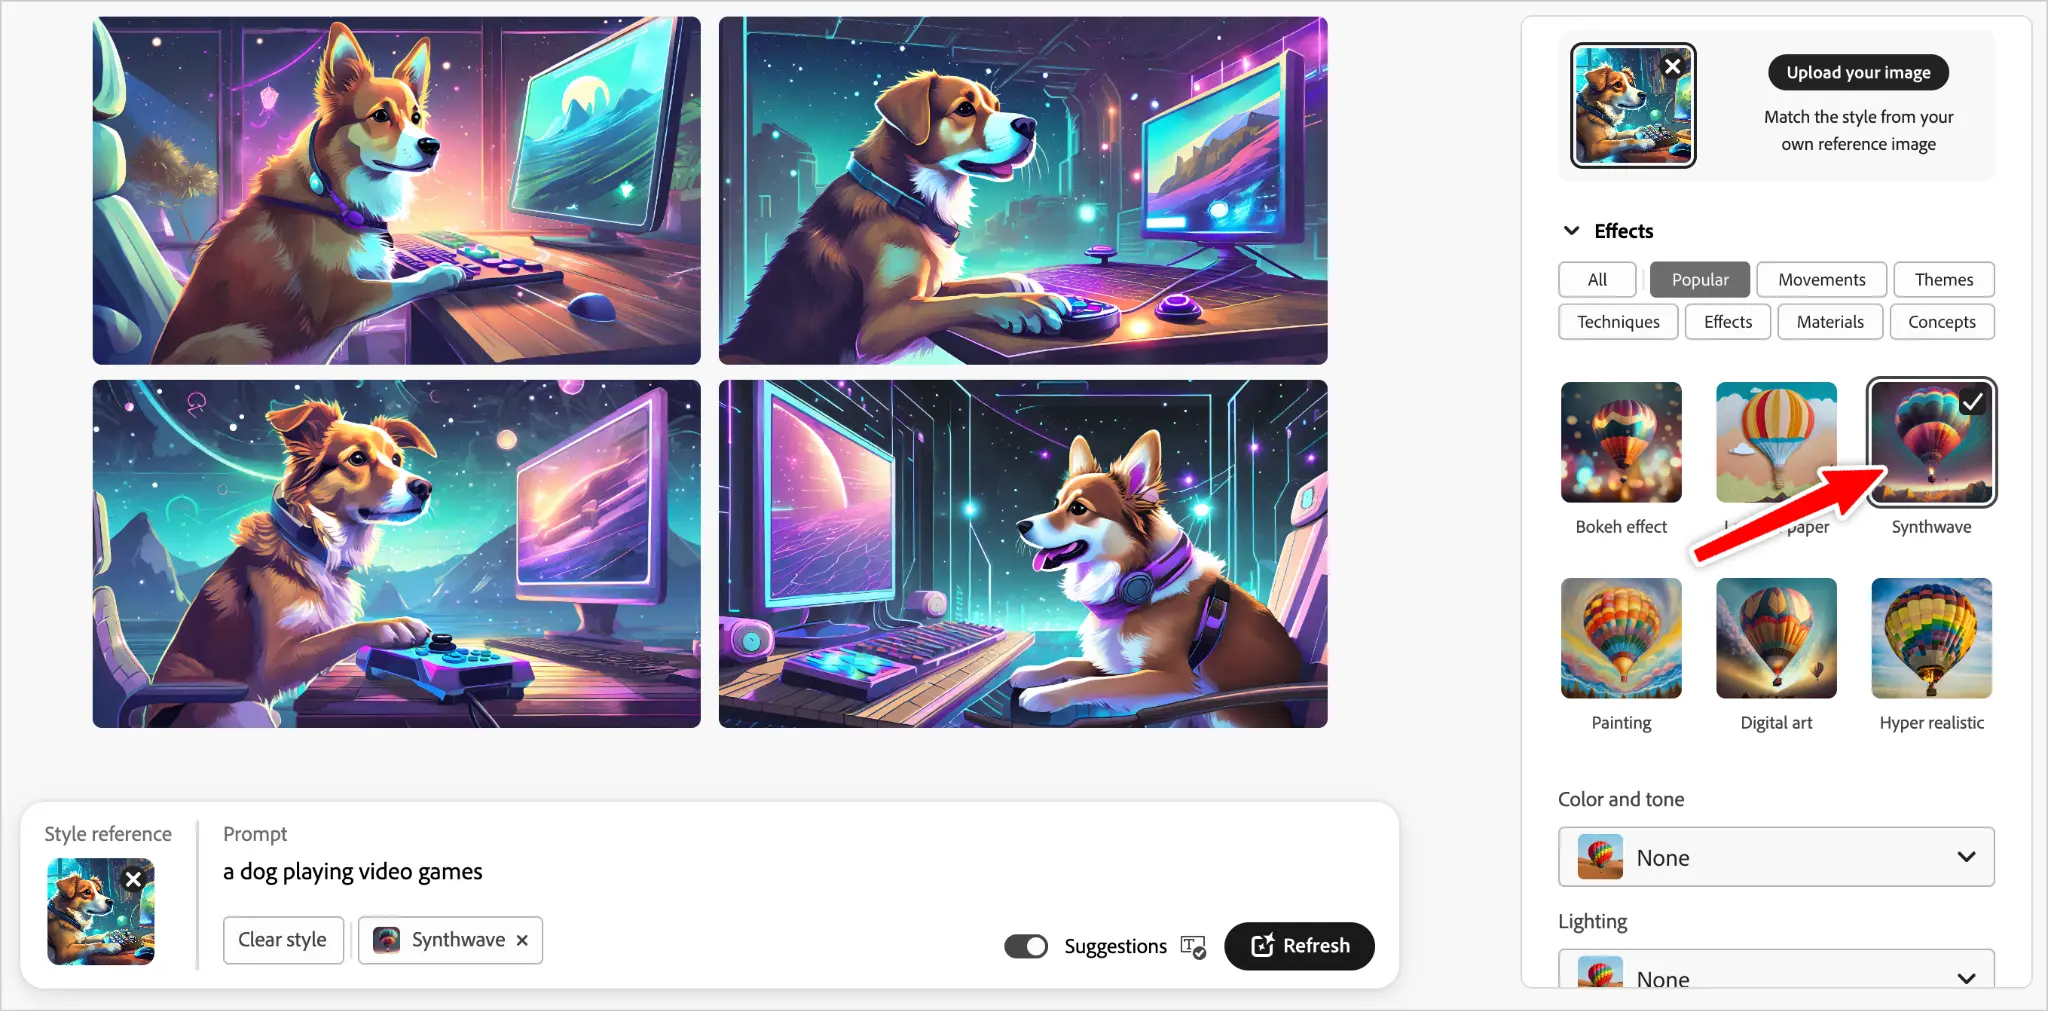
We can refine our effect further by using additional controls, such as Vibrant colors from the Color and tone option.

Number four is the new favorite. It’s not perfect, and you could definitely hire a professional artist to make improvements, but it’s fun and serves our purpose.
7. Export your image
To use your final result, hover over the image, click the More options icon, and choose Download.
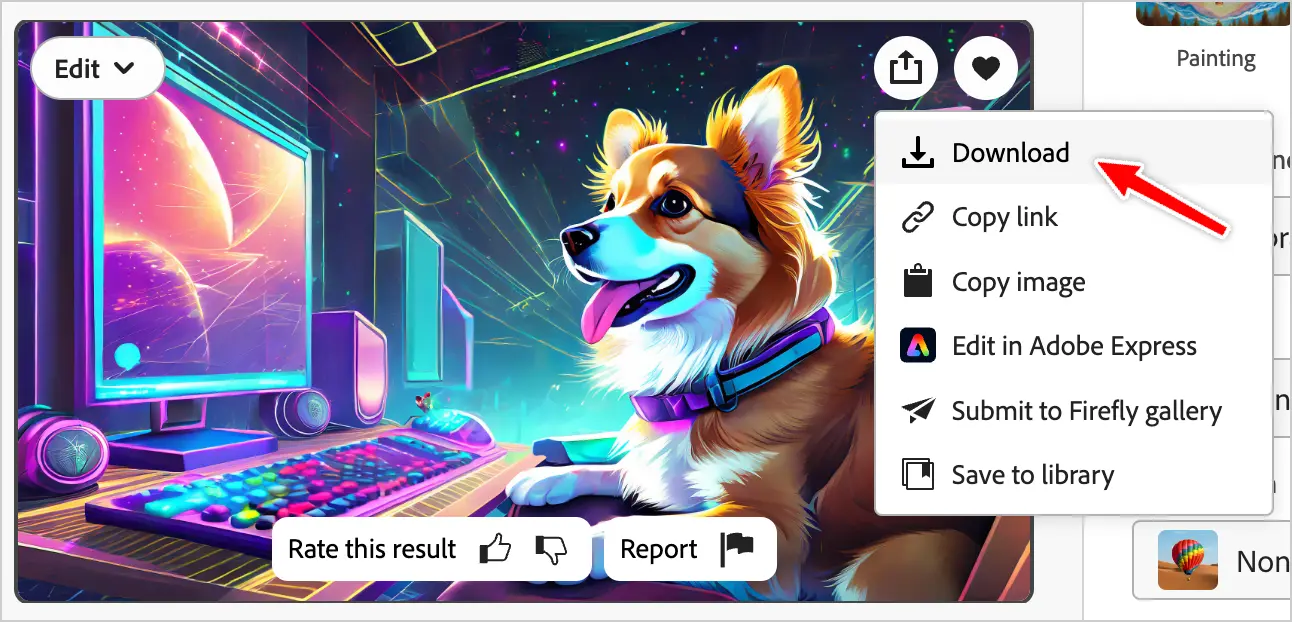
Firefly might show a window about Content Credentials, letting you know it will add information to the image, signifying AI created it. If you see this, click Continue to proceed.
Once ready, you can download the image to your computer. Then, all that’s left is to send it to your client, who can use it for the video thumbnail or even hire an animator to bring the inspiration to life.
Firefly best practices and tips
That’s the basics of creating images with Firefly! Use these tips to advance your skills and results:
- Find balance in prompt lengths. Short prompts (1-2 words) are often too vague, and Firefly tends to drop details from longer prompts. Start with your core inspiration and work from there. Use negative prompts in the “Exclude from image” field to avoid unwanted objects.
- Save your favorite images. Unlike other AI art generators, Firefly doesn’t show a history of your results. Whenever you like one and want to reference it later, hover over it and save it as a favorite. This ensures you can revisit the image instead of losing it with new generations. If you ever forget, try using your browser’s back button to attempt recovery.
- Experiment with prompt suggestions. If you have Suggestions toggled on, Firefly will show potential extensions for your prompt. While these aren’t always great, they might provide creative inspiration and help your process.
- Use Match for better branding. If you’re creating assets for a business or organization, you’ll likely want to stick to a color scheme or specific styles. Match helps align your images and get more precise outcomes.
- Practice. Just like other creative work, you’ll need to master the tools and hone your skills. Keep trying new ideas and testing Firefly’s capabilities to expand your creative potential.
Put your AI skills to work on Upwork
If you’re interested in using Firefly, why not make some money with it? On Upwork, you can find AI art jobs and apply what you’ve learned. You can even collaborate with other AI artists or hire creatives to develop your images and ideas.
Prefer organic art? There are plenty of opportunities to work with graphic design, digital art, animation, or whatever your natural intelligence enjoys. Sign up for Upwork if you haven’t already and start freelancing to put your creative skills to work.
Upwork is not affiliated with and does not sponsor or endorse any of the tools or services discussed in this article. These tools and services are provided only as potential options, and each reader and company should take the time needed to adequately analyze and determine the tools or services that would best fit their specific needs and situation.
Prices are current at the time of writing and may change over time based on each service’s offerings.

.avif)

Author Spotlight

Taylor is a writer and SEO expert based in Los Angeles. He has been helping organizations with websites since 2005, building content, audiences, and cross-functional skills. He loves the arts, culture, technology, and anything that gets a good laugh.